
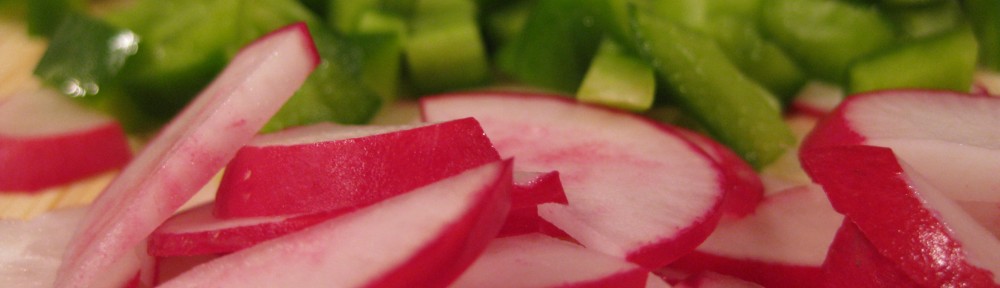
Pan-grilled pork chops with a chipotle rub and a tomato corn salad (with cilantro, onion, garlic, green pepper and lime juice). Nom. Nom.
Pan-grilled pork chops with a chipotle rub and a tomato corn salad (with cilantro, onion, garlic, green pepper and lime juice). Nom. Nom.
This recipe is slightly adapted from the Eating for Pregnancy book. Its version, appropriately enough, is entitled “Best-Ever American Meat Loaf.” Truly it is THE best meat loaf I’ve ever made.

The original calls for double of everything I’ve listed here, but two pounds of meat was way too much for just the two of us. For a slightly healthier version you could substitute ground turkey for the beef.
Best Meat Loaf Ever
Preheat oven to 350°F.
Combine all of the meat loaf ingredients in a large bowl and mix well (with a fork or a hand, preferably your own hand, but whatever…)
Form the meat mixture into a small baking dish or loaf pan.
If making the glaze, whip it up and slap it on. I mean… using a basting brush or the back of a spoon, apply the glaze over the top of the meat loaf.
Bake for about 45 minutes, or until completely cooked. An instant meat thermometer should read 160°F, and the juices should run clear when the center of the loaf is pierced.
Remove the loaf from the pan and allow the meat to rest for about 10 minutes before slicing.
This was served with a side of roasted sweet potato wedges (minus the apples and pecans in this version) and a veggie orzo salad.
Enjoy!

My husband LOVES lamb. I’m not the biggest fan. However, I do love meatballs! So this meal seemed like a good compromise. Making the meatballs with lamb lightens things up, and the seasonings of course, make a huge difference.
For these meatballs, I started them in a cast-iron pan to get a nice sear on the meat, then I finished them in the oven. They were really nice and juicy, but still fairly lean. A good trick for these is to use a mini-muffin pan. The meatballs fit perfectly and everything is kept in its proper place. Plus, my roasting pan was otherwise occupied.
I served these with a dollop of tzatziki sauce, warm garlic naan and roasted asparagus.
Lamb Meatballs
Preheat the oven to 375°F.
Mix all of the ingredients together in a bowl. Mix it well. Go ahead and get your hand in there. Give it some love.
Scoop out meat mixture and form into balls approximately 1 inch in diameter. Using a large spoon helps shape them, and you only have to get one hand messy. Set the meatballs aside on a plate.
Heat a tablespoon or so of canola oil in a cast iron skillet, over medium high heat.
Arrange the meatballs in a circular pattern in the pan. Be careful not to overcrowd the meatballs. I managed to get in about 8 or 9 at a time.
Pan sear the meatballs, turning until all sides are evenly but lightly browned.
Put the meatballs in the mini-muffin pan, or on a baking sheet and finish in the oven. About 10 minutes, or until desired doneness is reached. Or something.
Serve immediately.
Enjoy! Enjoy it more with a side of tzatziki and some naan…
Alternatively, this post could be called, “Things I WISH I made…”

This wonderful cookie comes to us from the lovely and talented Val of Dear Diva Desserts, who, by the way, made our wedding cakes and favors. Yes. I said cakes. With an “s.” And they were awesome.
Since we’re in town for the weekend, I stopped by Val’s shop today to say hello and to pick up some birthday cupcakes for my stepson. And a little treat for me. And the baby. I mean… oranges and cranberries are healthy right? She seemed to approve. I would think she would. I mean, you can actually SEE the orange zest! *hears angels singing*
The best thing about this cookie? It wasn’t too sweet. It was just sweet enough to satisfy a mild craving, but not overwhelming. The flavors were distinct and perfectly balanced.
So, thank you, Val. For being such an awesome baker. And for making my tummy happy.
I would never spend $36 on an apron for myself. Luckily after at least a couple of years hanging out on my Amazon wish list, my dear, wonderful, handsome, lovely husband purchased it for me! :)

By the way… That’s not me. I would never make such a silly hand gesture….. Inappropriate? Yes. Silly? Not so much.
The graphic is nice and solid. I am hopeful that it will last through multiple washes (the site claims it’s good for up to 200). The neck loop is adjustable. The tie is long enough to come around the front – perfect for hanging a towel. There is a side loop for grilling tongs, though I’m not the grill master in this house, so unless I feel like sticking in a whisk, it will probably go unused. The best part?! There are pockets!!! Big, roomy pockets!!! Not that I’ve ever used them, but I like that they are there. Just waiting for me to stuff something in them. The fabric is a heavy duty canvas and keeps me largely flour-free when baking. I make a big ass mess when I’m baking. I can’t help it.
So thanks to my husband for buying this bit of fun for me. And thanks Jon Wye for making it. Even if I am too cheap (er… frugal) to buy it for myself.
This dish is really simple to make on a busy weeknight. Full of flavor and fresh vegetables, it also reheats well for lunch the next day.

Full disclosure: I’ve never made my own curry sauce. Well, not a thai curry sauce. For this recipe I became Sandra Lee, but with less makeup and Thai-themed decor…
I’m not ashamed to admit that I used Trader Joe’s Thai Red Curry Sauce for this dish. First of all, I’m pregnant and I work full time. I just don’t always have the time and energy to a) shop for Thai red curry sauce ingredients and b) make the damn sauce from scratch – especially on a weeknight. Plus, the sauce from Trader Joe’s is pretty tasty, and it’s probably a lot cheaper to just buy it. And finally, if the sauce is tasty and it works, then maybe it’s a recipe that I can write down for my husband, so that he can make dinner once in a while – which will be especially helpful when the baby arrives.
So let me have my jar of sauce and embrace some practicality!
</rant>
Thai Red Curry Chicken
Start the rice in the rice cooker.
Heat oil over medium high heat. Add onion and garlic and cook for a few minutes.
Add the chicken pieces and cook until the chicken is white and no pink remains. About 7 minutes, maybe…
Reduce the heat to medium. Add the peppers and cook for another 3-5 minutes.
Add the sauce to the pan, stir all of the ingredients together, and reduce heat to low or simmer.
When the sauce is heated through, top a bowl of rice with the curry chicken and garnish with fresh, chopped cilantro.
Enjoy!

For breakfast this morning: homemade egg mcmuffins… So much better than the “real” thing.
Toasted english muffin, fried (or poached) egg, a slice or two of Boar’s Head Black Forrest ham – very lightly fried in the pan, swiss cheese melted on top of the egg. Assemble. Devour.
Enjoy! With a nice hot mug of french press coffee!
My husband, understanding my deep love for books, browsed through my Amazon wishlist and recently picked up this little bit of heaven for me: Confections of a Closet Master Baker by Gesine Bullock-Prado. (In case you’re wondering – I was – her name is not pronounced “Jez-eene” but rather “Guezz-sina”, with soft z’s and rhyming with subpoena).
Though I am only halfway through the book, I can relate to her love of baking for the comfort, relaxation and joy that it provides, as well as her preference to stay in the kitchen and bake rather than dealing with the front of the shop (ahem, people). The book is more than just an ordinary memoir; it almost reads like a dark children’s fairy tale, though perhaps the brilliant illustrations leading into each chapter contribute to that feeling. It’s kind of magical, and my favorite part (other than the illustrations) is that each chapter concludes with a recipe for something delicious and wonderful. But this is not supposed to be a book review, so let’s get to it.
I borrowed this recipe from chapter three: My Kingdom for a Scone. I only made a couple of minor modifications to suit my personal taste preferences and pantry. It is, after all, a chilly Saturday morning, and I’m not dragging myself out of the house to get dried cranberries when blueberries will work just fine.

Blueberry Cream Scones
Preheat the oven to 400°F.
In a small bowl, whisk together the cream, egg, almond and vanilla extracts and sugar until well combined.
In another (larger) bowl, mix together the flour, salt, and baking powder. Add in the bits of butter and blend with your fingers until the mixture resembles coarse meal.

Note: Feel free to use a pastry blender if you don’t want your hands in the mix, but honestly… Every once in a while you should feel the dough and work it with your hands. I’m sure the heat from the fingers probably helps the blending of the flour and the butter, and it’s good to understand how it should feel. Plus it’s fun and therapeutic. So go ahead and love your dough!
When the flour-butter mixture is ready, stir in the dried blueberries and cream mixture with a fork until the mixture just forms a sticky but manageable dough. Note: If it seems a little dry, try adding just a touch more cream.

Gently knead the dough on a lightly floured (clean) surface – about 30 seconds. Pat the dough into a circle, about 1/2 inch thick. Cut into eight wedges (like pie slices), or alternatively cut out rounds with a 1 1/2 inch fluted cutter. If using the cutter, gather scraps, reshape and cut more rounds.

Place the scones on an ungreased baking sheet. Brush with cream and sprinkle with sugar.


Bake for 15 to 18 minutes, or until lightly golden.

Enjoy!
My co-worker, Indu, often makes pita pockets with turkey kebabs for our office potlucks. They’re definitely a favorite and if you’re not quick to grab one, you will miss out.
For tonight’s dinner, I made a modified (ahem, quick/easy/cheating) version of her recipe. The key to this dish for me is definitely the lettuce salad that tops everything off. A mix of lettuce, green pepper, mint chutney, mayo and lime juice… OH. MY. HEAVENS. Indu, you’re my hero.

Turkey Kebabs on Pita with Mint Chutney Lettuce Salad (my quick and easy verison)
Cook the meatballs according to package directions. I baked them at 325° F for about 35 minutes, then quartered them.
Top the pita with the turkey meatball pieces.
Top with mint chutney lettuce salad.

Mint Chutney

Blend all ingredients in a food processor, except for salt and lime/lemon juice. After ingredients are blended, add salt and lime/lemon juice to taste.
Lettuce Salad
Mix all ingredients together adding more mayo, lime juice and chutney as needed.

Enjoy! (Next time, maybe I’ll share the not quick/easy/cheating version!)
Normally I spend my winters drinking a lot of mulled wine and the occasional – but delicious – hot toddy. But with a pregnancy underway, I am switching to mulled cider. And I have to say it’s just as good, if not better, than the wine. Or maybe that’s just the baby talking.
Traditionally, I tend to make my own blend of mulling spices: whole cloves, a cinnamon stick or two, orange slices or rind, a splash of vanilla extract and a bit of cardamom. Tie it all up in a bit of cheesecloth and drop it in a pan or a slow cooker with a bottle of wine, a cup or two of water and a bit of agave syrup – which offers a lower glycemic index than straight up sugar.
With the mulled cider, I used about 1 and 1/2 quarts of apple cider and a new spice blend from The Spice & Tea Exchange in Old Town, Alexandria, VA.

Mulling Spice Blend
The cool thing about this packet – besides the fact that it can be re-used – is that a spice pouch is already provided, so you just pour the spice contents (orange peel, cinnamon, cloves, star anise, ginger, allspice, and cardamom) into the bag, tie it up snug using the drawstring, drop it into the pot, and simmer away. With the cider, no additional sugar is necessary.

Mulled Cider
When it’s been simmering for 15 or 20 minutes – or however long you like – ladle into mugs to serve. If you are feeling fancy, garnish with a cinnamon stick or a slice of orange rind.

Enjoy!
