Nomography: Cranberry Orange Coconut Shortbread Heavenliness from Dear Diva Desserts

Alternatively, this post could be called, “Things I WISH I made…”

Can you hear those angels singing?

This wonderful cookie comes to us from the lovely and talented Val of Dear Diva Desserts, who, by the way, made our wedding cakes and favors.  Yes.  I said cakes.  With an “s.” And they were awesome.

Since we’re in town for the weekend, I stopped by Val’s shop today to say hello and to pick up some birthday cupcakes for my stepson.  And a little treat for me.  And the baby.  I mean… oranges and cranberries are healthy right?  She seemed to approve.  I would think she would.  I mean, you can actually SEE the orange zest!  *hears angels singing*

The best thing about this cookie?  It wasn’t too sweet.  It was just sweet enough to satisfy a mild craving, but not overwhelming.  The flavors were distinct and perfectly balanced.

So, thank you, Val.  For being such an awesome baker.  And for making my tummy happy.


Potluck Favorites: Brownie Pudding Peanut Butter Cup Trifle

Potlucks are a big deal at my office… So big in fact, that one of the questions I was asked in my final interview was “Do you cook?”  Followed by: “What cuisines?”  And “What do you make really well?”  I’m pretty sure that at least 30% of the reason I was hired was the promise of Lumpia, aka Filipino Egg Rolls.

Tomorrow we’re having a potluck to celebrate the promotion of a co-worker, Diwali (the Hindu “festival of lights” celebration), and another co-worker’s impending three week vacation to Pakistan. (Really, it’s just been almost a month, and so the potluck gods have decided it’s time…)  By request, I’m making my famous (a girl can dream!) Brownie Pudding Peanut Butter Cup Trifle, also known as “that layered chocolate brownie thing you make.”  I have to thank my friend Kim over at Food Truck Diva and her sister, Krista, for introducing me to this fabulously decadent crowd pleaser.

Browne Pudding Peanut Butter Cup Trifle

  • Brownies
    • Family size box of brownie mix (or you can make your own if unlike me you made it home before 8 pm and aren’t so tired you thought about passing out in a bowl of spaghetti at dinner)
    • Oil (according to brownie package directions)
    • Eggs (according to brownie package directions)
  • Chocolate Pudding
    • Large box o’ instant chocolate puddin’ (yes, I said puddin’!)
    • 3 cups cold milk
  • Whipped Cream
  • Reese’s Peanut Butter Cups, chopped into small pieces
  • Walnuts (optional)

Bake the brownies in a large 9 x 13 in baking dish according to package directions… Generally 350° F for 28-31 minutes.

While the brownies are baking, whisk the pudding into the milk for about 2 minutes until it starts to set.  Cover and refrigerate.

When the brownies have finished baking and have cooled thoroughly (or as thoroughly as you can stand it if you are dying for sugar), cut them into small squares.

Note: If you are making this a day ahead of time, when the brownies have finished cooling, leave them uncut, cover the dish with a lid or plastic wrap, and store until you are ready to assemble the dish.  Assembling this dish the night before can make it soggy and disappointing.  

When ready to assemble, layer each of the ingredients in a trifle dish:

  1. Brownies
  2. Chocolate pudding
  3. Whipped cream
  4. Peanut Butter Cup pieces
  5. Walnuts (if you like)
Brownies and Pudding
Brownies and Pudding!
Whipped Cream, Peanut Butter Cups and Walnuts
Whipped Cream and Peanut Butter Cups and Walnuts! Oh my!
Voila!
I’ll update tomorrow with a better photo… Maybe!

Repeat layering until you reach maximum capacity.  You can also just keep the brownies in the pan and do one round of layered ingredients. It’s not as pretty, but it tastes just as good.  Plus it’s easier.

For that extra special touch, drizzle some caramel sauce over the top layer…

Enjoy!  And try not to go into a diabetic sugar coma.

Cooking with Julia Child

image from www.flickr.com

For our first wedding anniversary, my husband surprised me with an amazingly thoughtful present: a couples cooking class that paid tribute to Julia Child.  The class, taught at CulinAerie by the delightful Susan Holt, focused on classic French cuisine, and Chef Holt entertained us with her knowledge of and personal experience meeting Julia Child.  

Okay… so I wasn't exactly cooking with Julia Child herself, but she was definitely there in spirit!

The class started with some basic instruction on how to prepare and cook our three course meal of Lentil Salad, Roast Pork with Mustard Cream Sauce, and Crêpes Suzette.  Chef Holt provided sufficient instruction on technique, without becoming overly technical.  It was, after all, a couples cooking class, designed primarily to be a fun, engaging, and entertaining experience for the pair. The meal was simple but full of flavor.  And the experience of cooking together was wonderfully intimate and romantic – despite the presence of 13 other couples!  Plus, they kept giving us wine!  

Here's a breakdown of our meal and some great tips I picked up along the way.

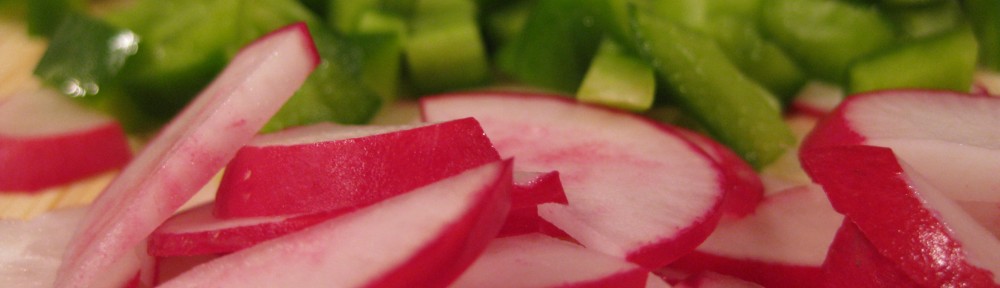
Lentil Salad with Chicory and Chevre

image from www.flickr.com

This simple salad of cooked French lentils with chicory (or frisée, endive, or any bitter green), goat cheese and a classic French vinaigrette caused my husband to declare that we should be eating more lentils.  It was so full of nutrients and flavor that I could easily eat this for a meal on its own.  

There are many varieties of lentils, and most commonly this legume is used in Indian cooking. French lentils are a distinctive dark green, and when properly cooked, should be al dente (firm, not mushy).  Lentils are high in protein, fiber and iron, folate and B1 (thank you Wikipedia!) and are a great option for vegetarian dishes.  

Cooking tips:

  • These only need to cook for about 25 minutes in simmering water, until just tender.
  • You don't really need to add salt, unless you want to add that flavor profile.  
  • If you do add salt, you may need to increase the cooking time a bit.

Pork Tenderloin with a Mustard, Tarragon Cream Sauce.  And bacon.

image from www.flickr.com

Julia Child, in volume one of Mastering the Art of French Cooking, describes the pork loin as the most expensive cut, but also the most attractive looking.  I am not sure I can comment on its attractiveness, but I do know that this cut of meat can be found at Trader Joe's for around $5, which is about half the price of my local neighborhood grocer.  (I still support the local grocer, just not in the form of buying their pork tenderloin!) 

Roast pork tenderloin is one of my favorite dishes to make because it's simple, flavorful and easy. Just season the meat, sear it on all sides, and let it finish cooking in the oven.  Voilà!

Some helpful tips:

  • Use canola or peanut oil for searing the tenderloin.  The smoke point of olive oil is too low and can impart its own flavors, which you don't necessarily want.
  • When searing the tenderloin, put it in the hot pan and leave it alone until it achieves a nice golden brown/almost caramel color on one side.  Only then should you pick it up and turn… Repeat on all sides until it's evenly seared.  You  may need to lower the heat a bit as you go.
  • Don't season the meat until just before you put it in the pan, and you really only need to use a little bit of salt and pepper.  The application of salt draws out moisture, so you want to wait until the last minute to apply this.

In regard to the last point, don't confuse basic salt and pepper seasoning with a dry rub or a marinade.  If you are going to use these, Julia Child advises at least 6 to 24 hours of marinating/seasoning time for a refrigerated loin roast.

Another good tip, let the meat rest in the pan, in the braising liquid (in this case wine and chicken broth) so it retains more moisture. Only remove the meat just before you start the sauce.  Slice the tenderloin just as the sauce is finishing, pour on the sauce and serve immediately.  This is the perfect, perfect, perfect temperature!  And the sauce – prepared with mustard, crème fraiche, and tarragon – was so good I wanted to lick my plate.

Oh, and this particular dish was also made with bacon.  And not just any bacon.  Nueske's bacon. Also commonly referred to as the best bacon in America… or at least is should be.  

Pork + Pork = Heaven  

Crêpes Suzette

image from www.flickr.com

"Fire in the hole!"  Not just an oft-repeated expression from the fabulous FX series Justified, but apparently the magic phrase of choice for the flambéed Crêpes Suzette!

Crêpes Suzette is a classic French dessert, and while crêpes can be a time-consuming, pain in the ass to make, they're soooo worth it.  Made with a few crêpes, butter, sugar, freshly squeezed orange juice, and an orange liqueur, such as Grand Marnier (if you like more of a cognac finish) or Cointreau…  C'est très magnifique!  

Tips on the art of flambé:

  • Never (Jamais!) pour the liqueur into the pan when it's over the flame.  Instead pull the pan off heat and pour in the liqueur.
  • Immediately thrust the pan back over heat, tipping the pan toward the flame and thus igniting the alcohol vapors!  All without actually sloshing everything into the fire!
  • And don't forget to yell "Fire in the hole!" while doing it!  Because it's fun to get in touch with your inner pyromaniac… and we need atmosphere dammit!  

Got all that?!   

Overall, this was a fun and memorable experience for the both of us.  We both learned new things and had an absolutely, lovely time cooking with and for each other.  And all of the wine didn't hurt either!  Thanks, Chef Holt and CulinAerie for a fantastic meal, and thanks to my amazing husband for a terrific first anniversary!  

image from www.flickr.com

Bon Appétit!

Apple, Fig and Bourbon Compote

image from www.flickr.com

Autumn, my favorite season, is upon us.  The farmer's market now has apples and cider and all of the things that are perfect and inviting on a cool, crisp fall morning.  While I am not a big fan of apple pie, I do love cooked apples.  This simple apple compote made with a fig spread (use fresh if you have them), a bit of bourbon, butter and brown sugar is lovely when paired with a (cheesy) polenta, or it can serve as a dessert on its own.  It also goes really well with grilled pork chops… wrapped in bacon… Mmm… bacon………..

image from www.flickr.com
Things that make me happy: Bourbon, fig spread, brown sugar

Apple, Fig and Bourbon Compote Recipe inspiration from here!

  • 1 tablespoon butter
  • 1 large or 2 small apples, peeled, cored, and diced
  • 2 tablespoons fig spread
  • 1/2 tablespoon brown sugar
  • 1 shot of bourbon – feel free to pour some in the compote, too! ;)

Peel, core and dice the apple.  

Over medium heat, melt the butter in a small saucepan.  Add the apple and cook for three to five minutes, until the apple just begins to soften.

image from www.flickr.com

Add the fig spread and brown sugar.

image from www.flickr.com

Mix together until the brown sugar is desolved and the fig spread just begins to thin out.

Remove the pan from the heat and pour in the shot of bourbon… Really, you can add as much as you like… It's really about how much bourbon flavor you want to taste and how long you have to cook it down.  

Back on the heat, stir in the bourbon.  

image from www.flickr.com

Bring it just to a low boil and reduce the heat to low.  

Cook the sauce down for another ten minutes or so.  Again, this can cook longer, but I was hungry! 

Serve alone or topped on a slice of grilled polenta.

Enjoy!

Mini Pavlovas

Glossy! Glossy! 

This light and airy meringue is a little bit of heaven and a perfect summer dessert.  It's like eating a subtly tangy, creamy, melty marshmallow with a crispy outer shell.  Piled high with freshly made whipped cream and your choice of fruits, it may seem a bit decadent but is probably far less sinful than a slice of chocolate cake.  As my official taste-tester and good friend Kat said: "The gooey center was the best and I didn't feel so guilty scarfing it down because of the fruit."  

On to the good bits…  

Mini Pavlovas, recipe adapted from here (eat boutique) and here (smitten kitchen).

  • 4 large egg whites
  • Pinch of salt
  • 1 cup sugar (superfine is generally recommended, but I didn't bother; if you want it superfine just put regular sugar into a food processor for a minute or so)
  • 1/2 tablespoon cornstarch
  • 1 teaspoon white vinegar
  • 1/4 teaspoon vanilla extract
  • 1/4 teaspoon almond extract

Preheat oven to 250 degrees.

Combine the sugar and cornstarch in a small bowl and set aside.

Pour the vinegar and extracts into a small cup and set aside.

Separate the eggs, setting aside the yolks for tomorrow's Hollandaise.  :)  

Note:  According to the Science of Cooking, "egg whites at room temperature can be beaten to a foam more easily than cold egg whites."  So if you prefer, you can allow the egg whites to come to room temperature before you begin.

In a large glass or stainless steele bowl, beat the egg whites and salt on low speed until egg whites form small bubbles, just before soft peaks begin to form.  About 2 or 3 minutes. 

Increase the speed to medium and gradually add in the sugar and cornstarch.  Continue to beat for a few more minutes.

Slowly pour in the vinegar and extracts and increase speed to high.  Continue to beat mixture until glossy and stiff peaks form.  Approximately 4 minutes.  

It should look kinda sorta like this:

image from www.flickr.com
But maybe with better lighting.. 

Line a baking sheet with parchment paper.

Depending on how large you would like your mini pavlovas, spoon the mixture onto the parchment paper into 4 (or 6 or 8) evenly sized circles, leaving a shallow depression in the center.  This will be helpful later when your piling on the whipped cream and berries.

Pre-oven form
Mini Pavlova's

Bake for about 1 hour and 15 minutes.  If you see the pavlovas are cracking or turning slightly brown, reduce the heat slightly.

Turn off the oven and prop the door open with a wooden spoon.  Allow the pavlovas to remain in the oven for another hour to cool.  

Cooling off

The pavlovas will be hard to the touch and may show signs of cracking as they cool.  This is normal.  It's okay…

You can store these for a few days or serve immediately… or as soon as you've made the whipped cream and washed the berries.  

Whipped Cream

  • 1 cup heavy whipping cream 
  • 1 tablespoon sugar
  • 1/2 teaspoon vanilla extract
  • 1/2 teaspoon almond extract

In a medium glass bowl, whip the cream until it begins to thicken.  Slowly add the sugar and then the extracts.  Continue to beat until the cream becomes thick and firm.  

To assemble the pavlova, top with whipped cream and your choice of berries.  Blackberries provide a nice tartness to complement the sweetness of the meringue.  Strawberries, blueberries or raspberries are also good.  

PavlovaGooeyThey don't last long

Enjoy!  While it lasts… 

Toffee.

Toffee… in April?!?  Abso-freaking-lutely.

I made this for an office potluck as a dessert topping for my coworker's "special brownie sundaes." Don't ask me what he meant by "special" though they were pretty damn awesome.  The toffee (in addition to the whipped cream, ice cream and homemade hot fudge sauce) provided just the right touch to finish things off.  Plus, it was good in the morning with coffee… And bribes… And we pretty much just snacked on it non-stop all day.  Hey… we're programmers.  We need sugar.  :)

toffeetoffee

Toffeerecipe from: http://www.thekitchn.com/thekitchn/dessert/recipe-mailing-toffee-005521

  • 1 lb (4 sticks) butter (I strongly recommend Land O'Lakes because it seems to have the right fat content and really holds up well.  I have tried Trader Joe's butter and it separates every time.  It's good butter… just not for candy making.)
  • 2 cups sugar
  • 1/2 tsp salt
  • 1 tsp vanilla extract (I use bourbon flavored.  It's awesome.)
  • 8 oz semi-sweet chocolate, chopped (be sure to use something that tastes really good as is as this will be part of the topping.)
  • 1 or 2 cups sliced almonds
  • Parchment paper (for lining the pan)

In a deep cast iron skillet, over medium high heat, begin melting the butter.  

As the butter begins to melt, stir in the sugar and salt.

Using a wooden spoon, continuously stir at a steady and  fairly rapid pace until the color turns a golden, nutty brown.  It will probably take about 20 minutes.  So… you might want to stretch before and after.  :)  Also, as the toffee progresses, I turn the heat down to medium or just above medium.  It's just my preference…  

Oh, and be careful not to let it burn.

stir stir stir

As you are stirring you may notice that the sugar butter mixture will creep up the sides and begin to stick.  (see next photo)

scrape the sides

You can either use a wet pastry brush to keep the sides clean, or just be diligent about scraping it back down with the wooden spoon.  It's kind of hard to stir steadily and rapidly AND brush the sides with a pastry brush… At least it is for me.  :)  

Keep stirring… 

making toffee

Oh, and don't let your husband take the photos…

bad john

When the color is right, remove from heat and stir in the vanilla extract.  It may sizzle.  That's okay.

Carefully (after wrapping your hands and arms in super thick fireproof mitts) pour the toffee into an approximately 10×15 in sheet pan lined with parchment paper.

pour into the pan

Spread the toffee out until it's even.  Allow to cool for about five minutes.

Sprinkle the chocolate onto the toffee.  When it starts to look a little glossy spread the chocolate over the toffee with a spatula.  

Sprinkle with sliced almonds.  Gently press the nuts into the chocolate to help them set.

Allow to cool and set for about 6 to 8 hours then break up into chunks.

mmm!

Enjoy!  With or without the special brownie sundae…

Reine De Saba avec Glacage Au Chocolat

The first time I made this cake was during a monster snowstorm in February of 2010.  My friend Amanda had bestowed upon me the gift of Julia Child's Mastering the Art of French Cooking for my birthday, and making her chocolate and almond cake seemed like a good way to spend a snowy afternoon.  

It was not.  

Well… at least it didn't seem like it while I was beating egg whites BY HAND with a wire whisk.  What was I thinking?  But I followed the classic techniques and gained some good experience.  And a few hours later I tasted a divine piece of heaven and instantly forgot about the pain in my arm.  The cake was moist and dense and each bite felt like I was eating a tiny chocolate truffle.  

IMG_8304

Recently I was inspired to make this for a dinner with Amanda and her mom, after watching an episode of The French Chef, in which Julia makes this cake and makes it look wonderfully easy.  Yet again, I was temporarily cursing her name, but it was worth every minute of feeling like "this is a big pain in the ass."  Kind of like having kids I suppose.  :)  

As Julia says, "This extremely good chocolate cake is baked so that its center remains slightly underdone; overcooked, the cake loses its special creamy quality."  And she's absolutely right. When testing the doneness of the cake, a toothpick or knife instered into the outside edge should come out dry and clean, and inserted into the center, still a bit sticky and moist.  

Here is the recipe in full, with a few minor tweaks that I've made to hopefully make it seem as simple as it seems when you watch Julia make it.

Reine de Saba (Chocolate Almond Cake)

For an 8-in cake pan, serving 6-8 people.  Williams Sonoma makes a really great 8-in cake pan.  And so does Hill's Kitchen.  It really does turn out better than a 9-in.

  • 4 ounces or squares semi-sweet chocolate (I like to use Baker's chocolate in the one ounce squares because it just makes life easier)
  • 2 Tbsp rum or brewed, cooled coffee
  • 1/4 lb or 1 stick softened butter
  • 2/3 cup sugar
  • 3 egg yolks
  • 3 egg whites
  • pinch of salt
  • 1 Tbsp sugar
  • 1/3 cup pulverized almonds or almond powder (you can find this at Trader Joes)
  • 1/4 tsp almond extract
  • 1/2 cup cake flour ready to go in a sifter (all-purpose is fine, just make sure it doesn't have baking soda or baking powder in it) 

Preheat oven to 350 degrees.  Thanks for putting this on a separate page Julia… really handy when you miss this step… 

Butter and flour the cake pan and set aside.

Melt the chocolate together with the rum or coffee.  Do this either in the microwave using a glass pyrex measuring cup or with a double boiler.  The chocolate should be kind of thin and glossy and smooth.  If you like, you can set this inside of a pan of hot water (off heat) to keep it warm until we're ready to use it.

In a large mixing bowl, cream the softened butter and sugar together for several minutes until they form a pale yellow, fluffy mixture. If you warm the bowl first, and chop the butter into smaller 1/2-in pieces, it makes this process a bit easier.  And when you soften butter… don't do it like this:

IMG_8298

Beat in the egg yolks until well blended.

Beat the egg whites and pinch of salt in a separate bowl until soft peaks are formed; sprinkle on the tablespoon of sugar and beat until stiff peaks are formed.  Do not overbeat.  A good test if they are done is to run a rubber spatula through them, turn upside down and see how they hold against it.  If they stick and the peaks don't bend, it's probably ready.

With a rubber spatula, blend the melted chocolate into the butter and sugar mixture.

Next stir in the almond powder and almond extract.

Immediately stir in 1/4 of the beaten egg whites to lighten the batter.

Okay… now pay attention…

Delicately fold in a third of the remaining whites and when partially blended, sift on one third of the flour and continue folding.

Alternate rapidly with more egg whites and more flour until all of the egg whites and flour have been incorporated.

Turn the cake batter into the buttered and floured pan.  Rotate around to spread the batter out, and push the batter up the sides of the pan close to the rim.  The purpose of this is to spread the batter out evenly and keep the cake from puffing up too much in the center.

Bake on the middle rack of a preheated oven for about 20-25 minutes.  

Cake is done when it has puffed, and when the pan is shaken the center moves slightly.  And again, when testing the doneness of the cake, a toothpick or knife instered into the outside edge (about 2 inches in) should come out dry and clean, and inserted into the center, still a bit sticky and moist.  

Allow the cake to cool in the pan for 10 minutes, then remove and cool on a rack for an hour or two. Frost when the cake has completely cooled.

Glacage Au Chocolate (Chocolate-butter Icing)

  • 2 ounces (2 squares) semi-sweet baking chocolate
  • 2 Tbsp rum or coffee
  • 5-6 Tbsp unsalted butter, slightly softened
  • A bowl with a tray of ice cubes and water to cover them (for setting the frosting)

Melt the chocolate and rum (or coffee) together until it is glossy and smooth and thin.  

Beat in the butter one tablespoon at a time.

Finally beat the mixture over the ice and water until the chocolate has cooled to spreading consistency.  

Pour over the center of the cake and spread with a spatula or knife.

Bon appetit!

IMG_8302

Chocolate Zucchini Cake

I've been feeling the need to bake something for a good month or so now…  Last Friday, I actually broke down and bought $20 worth of cookies from Whole Paycheck Foods so much was my desire for baked goods at work.  After cleaning my apartment on Saturday morning, slamming things around in the kitchen and sighing heavily over the fact that my (dear, sweet, lovely, wonderful, handsome) husband never wipes anything down in-said-kitchen, I decided some chocolate was definitely in order… On Sunday I finally got down to business with some zucchini and a new can of Pernigotti unsweetened cocoa powder, and I've been 40% nicer ever since.  :)

Pernigotti cocoa smells divine.  And mix it with some butter and sugar and eggs and apply  a bit of heat… Oh. My. Goodness.  No wonder Ina Garten always suggests this brand when she says "good" cocoa powder.  I found mine at Williams Sonoma, though it doesn't appear to be available on-line.

Anyway… enough jibber jabber.  Let's get down to cake.

IMG_8282

Chocolate Zucchini Cake, adapted from ChocolateAndZucchini.com of all places.

  • 2 cups flour
  • 1/2 cup unsweetened cocoa powder
  • 1 tsp baking soda
  • 1/2 tsp baking powder
  • 1/2 tsp salt
  • 1 cup light brown sugar
  • 1/2 cup (1 stick) unsalted butter at room temperature
  • 1 tsp pure vanilla (bourbon!) extract – feel free to add a splash of almond extract, too, if you like the flavor – chocolate and almond… mmm….
  • 2 Tbsp strong, cooled coffee (as C&Z says "this is just to deepen the chocolate flavor, you won't taste it in the finished product")
  • 3 large eggs
  • 1 1/2 cups unpeeled, grated zucchini (I used about 2 zucchinis and didn't measure…)
  • 4 oz. bittersweet chocolate chopped into small pieces

Preheat oven to 350 degrees and grease a square 8" baking dish.

In a medium bowl, mix together flour, cocoa powder, baking soda, baking powder and salt.

In a large bowl, cream the butter and sugar together until creamy.  Add the vanilla, coffee and eggs, mixing well between adding each ingredient.

In yet another (large) bowl…  combine zucchini, chopped chocolate, and 1/3 of the flour/cocoa powder mixture until the zucchini strands are entirely covered and chocolatey (but not very clumpy). 

**On a side note, the zucchini emits a lot of water.  I didn't bother to drain this, and I have a feeling it made the cake a lot more moist, though it seemed to take about 10 minutes longer to bake.**

Mix the remaining 2/3 flour/cocoa mixture with the butter/sugar/egg mixture until just combined.  It will be thick and awesome and it will taste amazing.  Though you shouldn't eat raw egg batter because it's not safe.  *insert Mom face here*

Fold the zucchini mixture into the batter, until just blended.  Do not over-mix.  (And by the way… what does this really mean?  So vague bakers of the world… so vague…)

Pour into greased cake pan and smooth and level batter.  Bake for 40-50 minutes or until a knife inserted in the center comes out clean.  I ended up baking mine for more like 50-60 minutes.  

Allow to cool for 10 minutes on a wire rack.  Serve slightly warm or at room temperature, but if you serve it slightly warm those little bits of chopped chocolate will be gooey and oozy and delightfully good.  

Enhancements (For free!):  Dust with powdered sugar, and/or top with fresh whipped cream and raspberries.

This was by far the best cake I've ever had that included vegetables.  And probably in the top five (at least) of cakes that didn't include vegetables.  Plus… since it does have vegetables, you can feel slightly less guilty when you chow down half the pa…  Er… um… 

Enjoy!

Be irrational. Have some pie.

Or be rational and make bread pudding…

IMG_7988

Getting ready to be pudding-ified!!!

Lemon Bread Pudding

  • 1/2 loaf of Challah bread diced into cubes
  • 3/4 cup sugar
  • juice and zest of 1 medium lemon
  • 1/2 cup melted butter
  • 3 eggs, separated
  • 2/3 cup milk (I used half cream, half 1% milk)
  • 1/2 tsp of bourbon vanilla extract

In a large bowl, combine the bread cubes, sugar, lemon juice and zest. Drizzle with melted butter and stir to blend ingredients.

In another bowl, beat egg yolks and vanilla with an electric mixer until thick and lemon colored; add the milk and blend well. Pour over the bread.

Beat egg whites in a metal or glass bowl until stiff peaks form.  Gently fold egg whites into the yolky, milky, bread mixture. Pour the whole thing into a lightly buttered (or Pam'd) square baking dish. Bake at 350 degrees for 30 minutes.

Serve hot (optionally with a lemon or cream sauce, though I just had it plain).  

IMG_7990

This was the best decision I made all day.

Recipe slightly adapted from here.