Nomography: Take that Egg McMuffin!

Homemade Egg McMuffin

For breakfast this morning: homemade egg mcmuffins…  So much better than the “real” thing.

Toasted english muffin, fried (or poached) egg, a slice or two of Boar’s Head Black Forrest ham – very lightly fried in the pan, swiss cheese melted on top of the egg.  Assemble.  Devour.

Enjoy!  With a nice hot mug of french press coffee!

Steakhouse Pasta

image from www.flickr.com

I love The Pioneer Woman.  Not only does she manage to be witty, warm and genuine, but her food is nearly always flawlessly wonderful.  It looks good, it tastes good, most of it is stuff I have or can easily find, and she provides great step-by-step instructions.  I'm fairly certain that her blog post on "How to Cook a Steak" is at least 50% of the reason why I am married today.  So when I stumbled upon her "Steakhouse Pizza" post the other day, I pined for it.  I am talking serious pining.  Steak AND Pizza?  How could it get any better?!  Drooling may also have been involved. Drooling… Pining.  Same thing.

After fantasizing about the steakhouse pizza nearly all day yesterday, I decided to pick up the necessary ingredients after work.  And then on the train ride home, I remembered that our oven had gone out the night before.  Crap on a stick!  

So instead of Steakhouse Pizza, we had Steakhouse Pasta.  It was still quite tasty and a great substitute for when you don't have an oven, and your grill is far too tiny for cooking a pizza. Stupid tiny grill!  Anyway… Thanks, PW, for some amazing inspiration.

Steakhouse Pasta

For the steak and onions:

  • 1 flank or skirt steak
  • Salt and pepper
  • 2 tablespoon olive oil
  • 2 tablespoon butter
  • 1 small yellow onion, sliced into thin strips
  • 1 teaspoon thyme
  • 1/2 tablespoon red wine vinegar or balsamic vinegar

For the sauce:

  • 1 jar Spaghetti sauce – I used Trader Joe's Roasted Garlic Marinara, but when I have more time, I usually make my own
  • 2-3 tablespoons balsamic vinegar
  • 1 tablespoon Worcestershire sauce

For the pasta:

  • 1/2 pound linguine
  • 1-2 teaspoons salt

Toppings:

  • Steak sauce
  • Freshly grated or shaved parmesan - or whatever cheese you prefer as a topping.  I used a three-cheese blend of asiago, fontina, and parmesan.
  • 1 tomato sliced thinly (optional)
  • Basil leaves (optional)

Begin by caramelizing the onions.  To do this properly it takes about 35-45 minutes.  I use a recipe from Ina Garten for this… It's full proof and the flavor is amazing.  Every time.  

In a large saute pan, heat 1 tablespoon of the butter and 1 tablespoon of the olive oil together until the better is melted.  

Add the onions and thyme, tossing to coat with the butter and oil.  Cover the pan with a lid and cook over medium-low heat for about 10 minutes, sweating the onions.  

In the meantime, season the steak with salt and pepper and set aside.

image from www.flickr.com

Remove the lid and continue to cook for another 25-30 minutes, until the onions are caramelized and golden brown.  Stir occassionally and make sure the onions aren't sticking.  Also, if the onions are browing too quickly, reduce the heat.  You definitely want to cook low and slow and avoid burning the onions. 

In the last two minutes, add the red wine vinegar or balsamic vinegar, scraping any bits from the pan, and season with salt and pepper.  

image from www.flickr.com

While the onions are cooking, start boiling the water for the pasta, adding a teaspoon or two of salt for seasoning.

In a large sauce pan, over medium-low heat, combine the marinara sauce, balsamic vinegar and Worcestershire sauce.  Cover.  Stir occassionally.  Reduce heat if necessary.

You can cook the steak in the same pan you used for the onions (setting the onions aside), or use a grill, or a grill pan and cook while the onions are starting to slow cook.  

Add another tablespoon each of butter and olive oil to the pan, melting together, and cook the flank steak over medium-high heat for about 6 minutes (for medium rare), flipping half-way through.  Set aside and let rest for ten minutes.

When the water is boiling, add the linguine and cook for about 7 minutes.  Add a cup of cold water to stop the cooking process.  Drain when ready to serve.

Slice the steak thinly, and if desired toss it back in the pan for another minute with the caramelized onions. 

image from www.flickr.com 

To serve, top the linguine with pasta sauce, steak, caramelized onions, a little bit of steak sauce, the cheese, and maybe some fresh basil.  I also added some fresh tomatoes on the side, which was tasty.

image from www.flickr.comimage from www.flickr.com

Enjoy!  Even if it's not pizza… 

Sugar Snap Peas with Lemon Butter and Sweet Corn

I've been thinking about the sugar snap peas at Graffiato for a couple of weeks now…  Light and buttery with a hint of lemon.  Served with a tomato pesto and goat cheese.  Cooked perfectly, they were simple and fantastic.  

So for dinner tonight, I set out not so much to recreate this dish – because hell, I'm not Mike Isabella – but to be inspired by it.

image from www.flickr.com

Sugar Snap Peas with Lemon Butter and Sweet Corn

  • 1 ear of corn
  • 2 cups of sugar snap peas, with the ends snapped off
  • 1/2 tablespoon butter
  • Juice squeezed from half of a lemon

Bring water to boil for the corn and snap peas.  

Boil corn and peas for about 3 minutes.  Rinse in cold water.  

Remove the corn kernels from the cob.

Melt the butter in a saute pan, over medium heat.  

Add the peas and toss to coat with the butter.  

Squeeze the juice over the peas and toss again.

Add the corn and toss all ingredients together.

Remove from heat and serve.  You can top this with a little bit of goat cheese if desired.  I tried it and it was good, but not necessary.

Notes:

  • This doesn't need to cook for very long in the saute pan.  The peas should be tender, but still have a bit of crispiness to them.  
  • You can serve this slightly chilled, but in that case, olive oil would probably be more suitable than the butter.
  • Another good option for this would be to grill the corn and steam the peas in a foil packet with the lemon juice and butter.  I would love to try it this way the next time.  On a weekend. When I'm not getting home from work at 7 pm.

This was served with chili-lime shrimp and risotto.

Enjoy!  With a nice glass of Prosecco…

Slow Cooked Pork Ribs

These pork ribs from White House Meats were coated in a simple dry rub of brown sugar, chili powder, and cayenne pepper.  Wrapped in a foil boat (like a tent, but shaped like a boat) with about 1/8 cup of water, I slow cooked them in the oven for about 3.5 hours at 250 degrees.

Mmm. Ribs. 

Oh. My. God.  The noises my husband made while eating these made me a very happy woman.

The meat was juicy and tender and fell off the bones.  The rub provides a subtle sweetness, but also a decent kick of spice.  No barbecue sauce necessary.  In fact, it would almost ruin these… 

Slow Cooked Pork Ribs

  • 1 pound slab of pork ribs
  • A bit over 1/2 cup brown sugar
  • 1/8 to 1/4 cup chili powder
  • 1 1/2 tablespoons cayenne pepper
  • 1 teaspoon salt
  • 1/4 teaspoon freshly ground pepper
  • 1/8 cup water

In a small bowl, mix the brown sugar, chili powder, cayenne pepper until well mixed and any lumps have been removed from the brown sugar.  Stir in the salt and pepper.

Coat both sides of the ribs with the dry rub.  

Wrap the ribs in a foil boat, and add 1/8 cup water before sealing.  The foil should allow air and moisture to circulate inside the packet, but should be sealed tight.  

Note: My friend Sharilyn suggests apple juice or wine as an alternative to water.  I’d listen to her because she’s a fairly amazing cook.

Add the foil packet to a shallow roasting dish and bake in the oven at 250* degrees for approximately 3.5 hours.  And don’t open the foil to check!  Just leave them alone and marvel at the glorious aromas emanating from your oven.

*Full Disclosure: I did turn up the oven to 350 for about 30 minutes in the middle of cooking because I was making goat cheese brownies, but I kind of doubt that it affected the ribs.  Most recipes I’ve read call for 200 degrees at 4 hours, some of them reducing the temperature for the last 2 hours.  Others I’ve read suggest 300 degrees for 3 hours.  All I know is that these were magical, so I’m sticking with what I know.     

Mmm. Ribs. 

Enjoy!  And don’t be ashamed of your finger licking ways… 

Goat Cheese Brownies

image from www.flickr.com

I've been having a huge, fiery love affair lately… with goat cheese.  Baked with vegetable tarts, crumbled on top of tomato salads, spread over a simple cracker… I just can't help myself.

This recipe was inspired by an episode of Throwdown with Bobby Flay, where he challenges (and loses to) the ladies of the Vermont Brownie Company, famous for their Dark Chocolate Chevre Brownie.  

I used Mark Bittman's simple and classic recipe for brownies (with some minor tweaks) and googled for ideas on how to make the goat cheese swirl.  Ultimately I settled on a slightly modified version of the goat cheese swirl from the Pink Apron.  

The combination was fantastic!  The deep chocolate flavor coupled with just a bit of salty, tanginess was a pleasant surprise and cut the richness of the chocolate in just the right way…  I think this could only be improved by the addition of a scoop of vanilla ice cream and a sauce made from some Fabbioli Raspberry Merlot.  Or maybe just by drinking the raspberry merlot itself.  :)

image from www.flickr.com
 

Goat Cheese Brownies

For the Brownies:

  • 10 tablespoons unsweetened cocoa powder, Pernigotti  HIGHLY recommended
  • 11 tablespoons unsalted butter, melted
  • Alternative: use 3 ounces unsweetened chocolate squares melted with 8 tablespoons (1 stick) butter
  • 1/2 cup brown sugar
  • 1/2 cup sugar
  • 2 eggs
  • 1/2 cup all-purpose flour
  • 1/4 teaspoon salt
  • 1/2 teaspoon vanilla extract, optional

Preheat the oven to 350 degrees and lightly grease an 8 inch square baking pan.

Stir together the cocoa powder and melted butter until smooth.  If you're not using cocoa powder, melt the butter and chocolate together in a double boiler or in a small sauce pan.

image from www.flickr.com

Add the sugars and mix well, making sure all of the lumps are gone.

image from www.flickr.com

Mix in the eggs one by one.

Add the flour, salt and vanilla (if using), and stir until all ingredients are incorporated.

image from www.flickr.com

Pour the batter into the greased pan and spread out with a spatula.

For the Goat Cheese Swirl:

  • 3 ounces goat cheese, room temperature will make it easier to mix
  • 1 tablespoon unsalted butter, melted
  • 1 or 2 tablespoons pure vermont maple syrup
  • 1 egg
  • 1 tablespoon all purpose flour

In a small bowl, combine the goat cheese and melted butter until smooth.  

Add the maple syrup and egg.  Stir until blended.

Stir in the flour and mix well.

Add the goat cheese mixture to the pan and lightly swirl into the brownie batter with a spoon.  

image from www.flickr.comimage from www.flickr.com

My grandmother taught me that when it smells done, it probably is… But just in case, bake for 20-25 minutes or until a toothpick inserted into the brownies comes out clean.  

image from www.flickr.com 

Allow to cool for about five minutes (who are we kidding)… Cut into squares and serve warm.  

image from www.flickr.com

Enjoy!  And try not to eat the whole pan at once…


Mike Isabella’s Graffiato

I just found my new favorite restaurant in DC, Mike Isabella's Graffiato.  Not only did I get to sit about five feet away from him while he was sitting at the bar and then plating food, but I got to eat his grandmother's gnocchi.  Blissful, light, moist, heavenly potato gnocchi!  

The service was fantastic. We weren't rushed.  Plates and glasses were whisked away almost as soon as we pushed them aside.  Glasses were refilled and drinks refreshed in a seemingly automated fashion.  

The dishes are small plates ideal for sharing, with a suggestion of about three to four dishes per person.  The food comes out as it's ready and the waiter advised against trying to devise any particular strategy for ordering.  We ordered a few items at a time as we pleased and just relished the food.  Our server was knowledgeable about the food and offered terrific suggestions, which opened our eyes to things we probably wouldn't have otherwise considered.  Also, when my husband ordered a DC Brau on tap, but they brought Peroni by mistake, the server corrected it before John even noticed.  

And did I mention that they offered Prosecco on tap?!  ON TAP!!! 

image from www.flickr.com
Mmm… Prosecco… On tap… And how cute is the plant in a tin can?

The restaurant had a modern and casual feel that also didn't try too hard.  It was dark and intimate, and my favorite part (well, other than the food) was being able to watch the chefs cook and plate the food.  And the music selection of upbeat rock and alternative brought me back to my childhood.

Here's our meal in review…  (A few of the photos are blurry… Sorry, I was hungry.)

image from www.flickr.com
Sugar Snap Peas with Tomato Pesto and Goat Cheese

First of all, goat cheese is one of our favorite things…  So much so that we ordered this dish solely because we wanted to eat the goat cheese.  The peas had a wonderful flavor of lemon and olive oil. It was almost buttery, but lighter.  The tomato pesto was something special… and the peas were perfectly crispy but tender.  This was a great start to the meal.

image from www.flickr.com
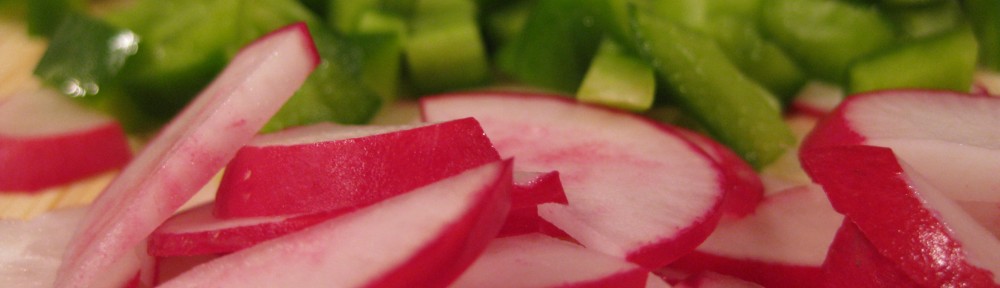
Spiced Red Beets with Pork Fried Almonds

The almonds were so good.  They reminded me of the nuts I roasted last Christmas, but with a lot less sugar.  The beets were sweet, but not overly so.  I'm pretty sure I could make those almonds. Mmm… pork fat.

image from www.flickr.com
Blue Crab Salad with Cucumber and Cantaloupe

The blue crab salad was one of the specials of the night.  And when they say crab salad, I'm pretty sure they actually mean CRAB.  And a *wee* bit of salad.  The cantaloupe added a perfect amount of sweetness, so that the salad didn't need a lot of mayo.  Nor anything else really.  The lump crab was perfectly moist, lightly sweet and full of flavor.  It was so satisfying on it's own.

And afterwards they brought us new plates, so the rest of our food didn't get all "beet-y."  :)

image from www.flickr.com 
The bar at Graffiato.  I'd love to sit here and just drink Prosecco and watch the chef's work.  It's a great concept.  And I want those light fixtures.

image from www.flickr.com

The countryman pizza at Graffiato is by far the most decadent pizza I've ever had. Black truffles, fontina cheese and a duck egg.  The yolk was cracked with a spoon and spread over the pizza as they served it to us.  Talk about food porn… The pizza crust was the perfect thickness and not charred.  We could actually watch the guy tossing dough from where we sat.  At about 6 slices per pizza, it's *almost* too much for small plates shared between two people, but the pizza here is definitely something special and not to be missed.

image from www.flickr.com 

Roasted potato gnocchi with braised pork shank and burrata cheese was our "pasta" dish, and probably my favorite dish of the night.  The gnocchi, apparently made from Chef Isabella's grandmother's recipe, was truly a delight.  The gnocchi was soft, moist and not even remotely heavy nor rich.  The braised pork was juicy and flavorful without overwhelming the tender gnocchi.  It had a bit of a subtly sweet but savory tomato flavor that I want to imagine as the Italian version of barbecue.  The totality of the dish was a flavor combination and texture that I don't know how to fully articulate, but it's definitely a food memory that I will not soon forget.

image from www.flickr.com

This hearty wood oven dish of three pork ribs and a coriander yogurt was our next to last dish.  The meat fell off of the rib bones.  The greek style yogurt, flavored with just the right amount of coriander was a lovely complement to the dry rub, oregano seasoned ribs.  

For our final dish of the night we wavered between a classic Caesar salad and dessert… The dessert won out, but I'd love to try the salad someday.  The "croutons" are made from natural and fresh cream cheese (think nothing like the Philadelphia cream cheese you buy in stores), which is rolled in polenta and deep fried.  Umm… I think I need to make those…  

image from www.flickr.com

Last but not least… dessert.  We ordered the Panna Cotta.  Coconut, pineapple, cashews, basil… The panna cotta had a subtle hint of coconut, though I really couldn't taste any cashew.  The pineapple seemed to be cooked and cooled with a sort of simple syrup that topped the panna cotta. Small, perfectly diced squares of watermelon mixed with basil topped the dish.  Basil and watermelon?!  How did I not know about this amazingly fantastic combination?  The dessert was the perfect end to a fairly rich and indulgent meal.  Light, refreshing and not overly sweet, we were definitely pleased.  And even more so when the waiter complimented our selection by saying how refreshing it was to have a table that didn't order the chocolate tart.  As much as I love chocolate, I'd have to choose this any day…    

image from www.flickr.com
Chef Mike Isabella… about five feet from our table.

After our meal, Chef Isabella was standing near our table and I couldn't resist thanking him for an amazing meal.  He was gracious and polite and asked if we had a good time.  We did indeed.  

We ordered a total of seven dishes and left full and content, but not stuffed and in pain.  Best of all, the prices were fairly reasonable given the level of service and the quality of food.  

There are so many other things I'd love to try, like the ham plates, the lobster, and the polenta with spicy pork meatballs and a soft egg.  But next time, I think I'll try the chef's tasting menu…  Who's with me?

Smoked Andouille, Summer Vegetables, Linguine and Cream Sauce

yummy yummies

I'm really not sure what to call this dish, since it was essentially another edition of "make shit up for dinner" night.  But it must have been good because the husband ordained me "the sorceress of yummy yummies."  

On to the tasty parts… 

Smoked Andouille, Summer Vegetables, Linguine and Cream Sauce

  • About 1 lb smoked andouille sausage, casings removed
  • 1 medium zucchini, diced
  • 1 medium carrot, chopped into small sticks
  • 4-5  red, yellow and orange baby bell peppers, chopped
  • 1 yellow tomato, diced
  • 1/2 cup heavy cream
  • 1/2 cup half-and-half (see, I'm trying not to kill you!)
  • 1/4 cup white wine
  • 1/4 cup blend of fontina, asiago, and parmesan cheeses (plus more for topping, optionally)
  • 1 lb fresh linguine

Crumble the andouille and cook thoroughly in a deep sauce pan over medium-high heat.

Drain excess fat from the sausage.

Reduce heat to medium.  Add the zucchini, carrots and peppers and cook for 4-5 minutes.    

Meanwhile, bring water for the pasta to boil.

Add the tomato, heavy cream, half-and-half and white wine to the sausage and veggie mixture. Bring to a slow boil, then reduce heat to low and simmer until sauce begins to thicken slightly.

Note: Don't cook the hell out of this… The veggies should still be a bit crisp when everything is served.

When the water begins to boil, add the fresh linguine.  Cook for about 2 and a half to 3 minutes.  If using dried pasta, cook according to package directions.

Stir in 1/4 cup of the three cheese blend and allow to melt into the sauce.

Drain the pasta.  

Dish into bowls and top with sausage, veggies and sauce mixture, and optionally more cheese.  

Melty!

Enjoy!  If you think your thighs are man enough to handle it! :)


Summer Vegetable Tart

I picked up some zucchini, squash and mini eggplants from the farmers market this weekend and decided to turn them into a goat cheese and bacon delivery mechanism.  Because I love goat cheese.  And bacon.  Mmm… bacon…  And you know… it's good to eat vegetables.  And stuff.

Summer Vegetable Tart

Summer Vegetable Tart with Goat Cheese and Bacon

  • 1 small zucchini
  • 1 small yellow squash
  • 3 mini eggplants
  • 1/2 tablespoon butter
  • 1/2 tablespoon olive oil
  • Smidge of salt and pepper
  • Puff pastry (I used four squares of puff pastry measuring approximately 4×4 inches)
  • Goat cheese
  • 2 strips of bacon, cooked and broken into small pieces

Preheat the oven to 375 degrees, or the specified temperature on the package directions of the puff pastry.

If using frozen puff pastry, defrost for about 20-30 minutes at room temperature, or according to whatever the package directions specify.  If you're making puff pastry from scratch, congratulate yourself on your awesomeness.  Also, open a bottle of wine and start drinking… because you're probably going to need it.  Julia Child knows!

Wash and chop the zucchini, squash, and mini eggplants, leaving the skins on.

Chopped veggies

In a large saute pan, melt the butter and olive oil together over medium heat.  

Add the vegetables, a little salt and pepper to taste, and saute for about 2-3 minutes.  

Add a splash of balsamic vinegar (about 1 tablespoon – more or less depending on how prominent you want the flavor to be).  

Note: The balsamic vinegar really makes the flavor when coupled with the goat cheese.  The marriage of these two flavors is really what makes this tart special.  Even if I like to pretend it's the bacon.

Toss the vegetables to coat.  Cook for another minute or so, then turn off and remove from heat.

Sauteeing Vegetables

Line a baking sheet with parchment paper and transfer the puff pastry on to it.

Score the edge of the puff pastry squares with a knife and poke several times with the tines of a fork.  Brush very lightly with some olive oil or an egg wash.  Top the squares of puff pastry with the lightly sauteed vegetables.

Assembling the tarts

Add some goat cheese and pop the tarts in the oven.  

Top with Goat Cheese

Ready for the oven… Mmm… Goat Cheese…

Bake for about 20-25 minutes or for however long the package directions say you should.

In the meantime, cook the bacon, if you haven't already done so.  Set aside to drain the excess grease from the bacon.  Allow to cool and chop into bite size pieces.

With a few minutes left of bake time, add the bacon to the tarts.

When the edges have puffed up and turned lightly golden brown, remove from the oven and allow to cool for a couple of minutes before serving.

Voila!

Enjoy!  

Grilled Cheese. Now With Bacon.

How can I possibly make a grilled cheese more unhealthy?  Add bacon.  

My ultimate comfort food

Grilled Cheese with Bacon

  • 2 slices bacon
  • 2 slices rye bread
  • A slab of butter, approximately 1 tablespoon
  • Cheese (I'm lazy, so I used a slice of American cheese. But you should feel free to experiment with one or more unprocessed cheeses.) 

Fry up the slices of bacon and when crisped to your liking remove from the pan and set aside on a paper towel to soak up the excess grease.  

Off heat, remove the bacon grease from the pan.  

Tip: Store bacon grease in a jar and use it for making popcorn later on.  It gives it an awesome smoky flavor.  Thanks to Kat for enhancing my life with this bit of knowledge!

Over medium heat, melt about half a tablespoon of butter in the pan.  Add a slice of bread.  

Top the bread with cheese and after about 30 seconds, add the bacon (break into pieces first). Top with another slice of bread.  

After another 30 seconds or so, remove the sandwich with a spatula and add the other half tablespoon of butter.  As it melts, flip the sandwich back into the pan. 

Remove after a minute or so… or when the bread has turned crispy and golden on both sides.  

Mmm... bacon...
Mmm… bacon…

For the record, I did eat a peach after this monstrosity.

Enjoy!  With or without tomato soup, but definitely not without the bacon.

Baja Salad with Pan-Seared Chili-lime Shrimp

image from www.flickr.com

Last weekend at our local Farmer's Market, I scored a huge bunch of lettuce  for $2.50.  It filled up a regular sized plastic grocery bag.  One head of it!  That same day I also scooped up about a dozen back issues of Cook's Illustrated that the library was giving away for free.  I also bought a lottery ticket, but apparently my lucky streak ended at the library!  Stupid lotto.

If you've never read Cook's Illustrated, I would suggest giving it a chance.  The magazine is incredible for explaining the finer points of ingredients and techniques.  (I mean, do you know how much protein is found in which types of flour, and why it's important when it comes to baking cakes versus breads?  I do!)  They offer great tips on everything from organization and food storage to more efficient ways of doing things like mincing chilis.  And if you have a scientific-leaning mind, it's also quite interesting to read their break-down of the recipe testing process to show how they really have derived the best recipe for something.  

In a back episode of Cook's Illustrated, I read about how to cook pan-seared shrimp, and while I've recently been making a lot of shrimp (as I prefer it over fish in general and it's relatively quick to cook and healthy) I've just been roasting a lot of it.  But it just seemed like it could be a lot better in texture and flavor.  Having excessive amounts of lettuce for just two people, and now drooling over pan-seared shrimp, I decided that a Baja Salad of sorts was in order.  

Let us begin.  (Pardon the pun.)

The Cook's Illustrated recipe for 21/25 shrimp (the size of shrimp such that there are 21 to 25 pieces per pound): 

  • 2 Tbsp vegetable oil
  • 1 1/2 pounds 21/25 shrimp, peeled and de-veined
  • 1/4 tsp salt
  • 1/4 tsp ground black pepper
  • 1/8 tsp sugar (this is for caramelization)

Heat 1 Tbsp oil in a 12-in skillet over high heat until smoking.  Meanwhile, toss shrimp, salt, pepper and sugar in medium bowl.

Add half the shrimp to the pan in a single layer and cook until spotty brown and edges turn pink (about 1 minute).  Remove pan from heat; using tongs, flip each shrimp and let stand until all but very center is opaque, about 30 seconds.  Transfer shrimp to a large plate.

Repeat with remaining tablespoon of oil and shrimp.  

After second batch has stood off heat, return first batch to skillet and toss to combine.  Cover skillet and let stand until shrimp are cooked through, 1 to 2 minutes.

Serve immediately.  

I adapted their version for my own tastes…  I'm sure that's some kind of cardinal sin, but it tasted damn good.

Pan-Seared Chili-lime Shrimp

  • 1 1/2 – 2 Tbsp olive oil
  • 1/2 Tbsp butter 
  • Chili-lime rub (Mine came from Pampered Chef!)
  • 1 pound 21/25 shrimp, peeled, but with tail-on

Shrimp should be rinsed, but patted dry.  Put the shrimp in a large plastic ziploc bag, and add a couple of tablespoons of the chili-lime rub.  Toss to coat shrimp evenly.  I let the chili-lime coated shrimp sit in the refrigerator for about an hour, but you could probably cook it right away.

Over high heat, add the oil and butter to a grill pan (or regular skillet).  When the butter is melted and almost starting to brown, add half the shrimp to the pan, in a single layer, and not too crowded.

Cook for about 90 seconds on one side, then flip with tongs.  Cook for another 90 seconds then remove to a bowl and cover with foil.  

Add the second half of the shrimp, in a single layer and cook for 90 seconds on each side.  After the last 90 seconds, turn off the heat, and add the first batch of shrimp back into the pan.  Toss to mix together, cover with a lid, and allow the shrimp to cook for another minute (at most).  Shrimp should be slightly pink and opaque.

Serve immediately over the salad.

Baja Salad

  • Lettuce, rinsed and chopped (enough for two salads)
  • 1 ear of corn, boiled or grilled, and de-cobbed
  • 1 can black beans, warmed
  • 1 tomato, diced
  • Fresh salsa
  • 2 lime wedges
  • Shredded mexican cheese (optional)

Prepare the corn and black beans.  Chop the lettuce, tomato and make the salsa (you can make this ahead and store in the refrigerator).  

Divide the lettuce into two bowls.  Top with corn, black beans, tomato, salsa, and optionally cheese.  Add the shrimp.  Sprinkle with lime juice.

image from www.flickr.com

Enjoy!  With or without a mojito!